Charging a lead acid battery incorrectly can destroy it in hours, waste your money, and even create safety hazards. Yet most battery failures stem from improper charging rather than battery defects. Whether you're maintaining a 12V car battery, UPS system, or solar storage bank, understanding the proper way to charge a lead acid battery is essential for performance, longevity, and safety.
This guide covers everything from basic charging steps to safety precautions and best practices, helping you maximize battery life while avoiding costly mistakes.
Understanding Lead Acid Battery Chemistry
Lead acid batteries store and release electrical energy through a reversible chemical reaction. During discharge, sulfuric acid electrolyte reacts with the positive (lead dioxide) and negative (spongy lead) plates inside the battery, forming lead sulfate and water while releasing electrons. The charging process reverses this reaction, converting lead sulfate back into lead dioxide, lead, and sulfuric acid.
Undercharging allows lead sulfate crystals to harden on the plates (known as "sulfation"), permanently reducing battery capacity. Overcharging, conversely, electrolyzes water, producing explosive hydrogen and oxygen gases, and can damage plates due to excessive heat.
Lead acid batteries primarily come in several types, each with slightly different charging requirements:
- Flooded: Traditional type, requiring regular replenishment with distilled water.
- Sealed Maintenance-Free (SMF): Does not require water addition.
- Absorbed Glass Mat (AGM): Electrolyte is absorbed in fiberglass mats, making them spill-proof and low internal resistance.
- Gel: Electrolyte is in a gel form, highly resistant to vibration and deep discharge.
Can a Lead Acid Battery be Recharged?
Absolutely. Lead acid batteries are designed for hundreds to thousands of charge cycles when properly maintained. However, the quality of each recharge directly impacts total lifespan.
Do Lead Acid Batteries Need a Special Charger?
Lead-acid batteries require chargers specifically designed for their chemistry. Using an incompatible charger is one of the most common reasons for premature battery failure. Lithium battery chargers, for instance, must never be used for lead acid batteries due to their entirely different charging curves and voltages.
Proper way to charge a lead acid battery
To properly charge a lead-acid battery, you must use a compatible charger that employs a multi-stage charging algorithm (typically bulk, absorption, and float), which combines constant current, constant voltage, and taper current charging.
The lead-acid battery charger automatically adjusts its output based on the battery's needs and should deliver between 2.40–2.45 V per cell for cyclic use, and 2.25–2.30 V per cell for float or standby applications.
Charging Methods and Voltage Settings
The table below outlines the charging methods and corresponding voltage ranges suitable for various DC systems. By adhering to these specified voltage ranges, the lead acid battery can be charged efficiently and safely.
| Charging Method | Principle of Operation | Lead Acid Battery Cell Voltage Range | 12V Lead Acid Charging Voltage Range | 24V Lead Acid Charging Voltage Range | 48V Lead Acid Charging Voltage Range |
|---|---|---|---|---|---|
| Constant Current (Bulk) | High, steady current is applied until the voltage setpoint is reached, rapidly charging the battery. | N/A | Voltage rises to achieve ~14.4V - 14.8V setpoint | Voltage rises to achieve ~28.8V - 29.6V setpoint | Voltage rises to achieve ~57.6V - 59.2V setpoint |
| Constant Voltage (Absorption) | Voltage is maintained at the peak level as current decreases, allowing the battery to fully absorb the remaining charge. | 2.40V - 2.45V per cell | Maintains 14.4V - 14.8V | Maintains 28.8V - 29.6V | Maintains 57.6V - 59.2V |
| Float Charging | Lower constant voltage offsets self-discharge while preventing overcharging, ideal for standby use. | 2.25V - 2.30V per cell | 13.5V - 13.8V | 27.0V - 27.6V | 54.0V - 55.2V |
| Equalization Charge (Flooded Only) | A controlled overcharge used periodically to stir electrolyte and balance cells, helpful for preventing sulfation. | 2.50V - 2.70V per cell | Typically 15.0V - 16.2V | Typically 30.0V - 32.4V | Typically 60.0V - 64.8V |
Our solar battery charger will automatically detect the battery system voltage and make the necessary adjustments, ensuring that your battery is optimally charged and maintained without manual intervention. Always set the charger to the correct lead-acid battery type (AGM, Gel, Flooded) and consult the battery manufacturer's guidelines for any specific requirements.
Steps to charge a lead acid battery
Pre-Charging Inspection and Safety
Before connecting any cables, a thorough inspection is critical to ensure safety.
- Inspect the Battery Casing: Carefully check the battery for any signs of physical damage, such as cracks, leaks, swelling, or bulges. If you find any damage, do not proceed with charging. The battery may be internally compromised and unsafe.
- Clean the Terminals: Ensure the battery terminals are clean and free of corrosion. A clean metal-to-metal connection is essential for efficient charging. Use a wire brush or terminal cleaner if necessary.
- Check Electrolyte Levels (Flooded Batteries Only): For non-sealed, flooded batteries, remove the vent caps and visually inspect the electrolyte level. The liquid should completely cover the lead plates. If the level is low, top it up only with distilled water to the specified fill line.
- Ensure Proper Ventilation: Batteries generate heat during charging. Place the lead acid batteries in a well-ventilated area for charging, and ensure there is at least 0.5 inches of space between batteries to allow for air circulation. The charging process naturally produces flammable hydrogen gas. Never charge a battery in a sealed container or a confined, unventilated space.
Step1. Connecting the Charger
Correct connection order is crucial to prevent sparks, which can ignite hydrogen gas.
- Power Off: Ensure the battery charger is unplugged from the wall outlet and turned off.
- Connect Positive (Red): Attach the red (+) clamp from the charger to the positive (+) terminal on the battery.
- Connect Negative (Black): Attach the black (-) clamp from the charger to the negative (-) terminal on the battery.
- Power On: Plug the charger into the wall outlet and turn it on.
Step2. Select the Battery Type
Modern smart chargers and solar charge controllers come with preset charging profiles for mainstream battery chemistries. This feature requires you to select your specific battery type to apply the correct charging algorithm.
-
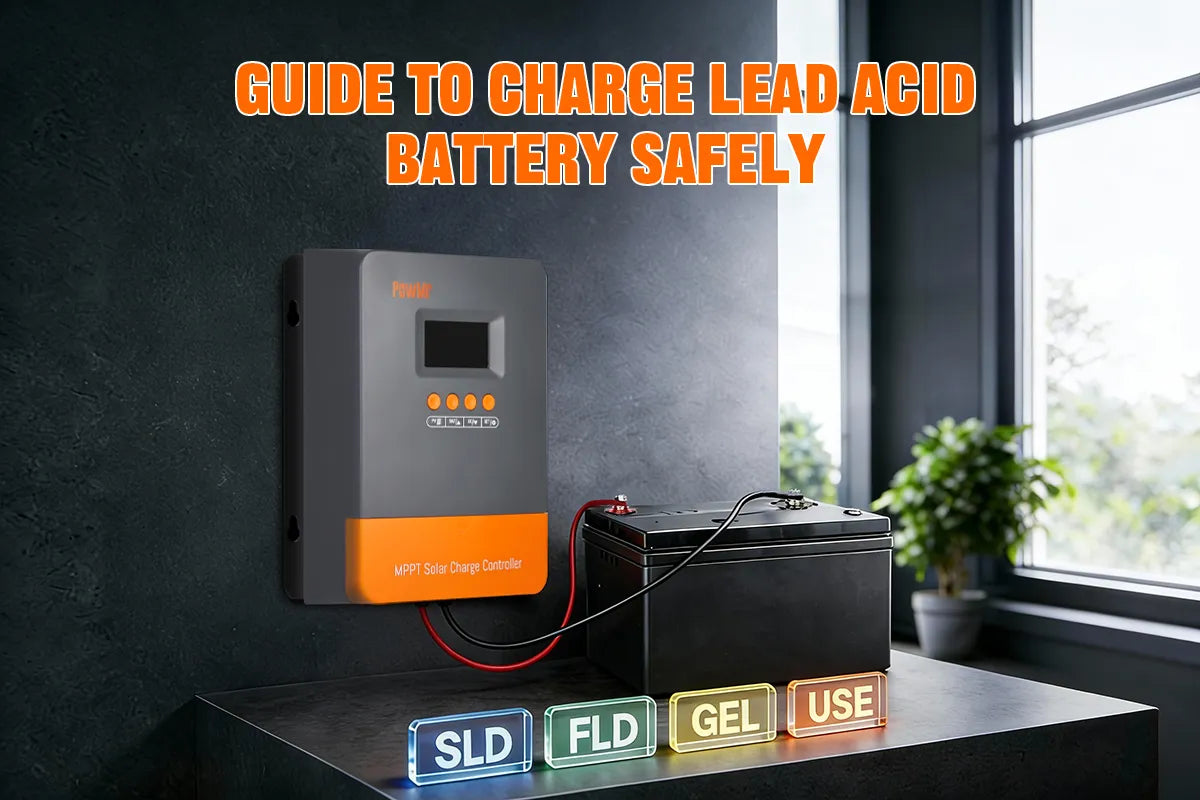
Select the Preset Profile: On your charger, choose the setting that matches your battery. For example, on a PowMr MPPT solar charge controller, you might see these options:
- SLA: Sealed Lead Acid (often used for AGM batteries)
- GEL: Gel Sealed Lead Acid
- FLD: Flooded Lead Acid
- Verify and Customize: Always compare the charger's preset voltages with those recommended by your battery manufacturer. If they don't match, or for precise control, select the "User-Defined" mode (often labeled USE). This allows you to manually set the charging parameters in the next step.

Step3. Set Correct Parameters
If you selected a "User-Defined" profile in the previous step, you will need to manually set the key voltage and current parameters. These values are critical for battery health and should be based on the manufacturer's specifications.
A. Setting Voltage Parameters:
You will typically need to configure several key voltage setpoints based on your battery manufacturer's datasheet. Besides the boost charging and float charging voltage, another two are:
- Under-Voltage Cutoff Voltage (Low Voltage Disconnect): This setting protects the battery from over-discharge by disconnecting the load when the battery voltage drops to a critical low point (e.g., ~11.5V - 12.0V). You can determine this threshold based on the minimum State of Charge (SOC) recommended by the battery supplier and by referencing a lead acid battery voltage chart.
- Under-Voltage Recovery Voltage: The voltage the battery must reach (via charging) before the charger will reconnect the load after a low-voltage disconnect event.
2. Setting Current Parameters (If Supported):
Some advanced chargers, like the PowMr 60A MPPT solar charger (ultra), allow you to customize the charging current.
- When setting the current, consider the battery manufacturer's recommended C-rate (charging rate relative to capacity). A safe and effective rate for lead acid battery is typically between 0.1C and 0.25C.
- You can balance charging speed against battery health. A lower charging current is generally better for lead acid battery longevity, as it generates less heat and stress. For example, for a 200Ah battery, a 20A charge (0.1C) is gentler than a 50A charge (0.25C).
Step4. Monitoring the Charging Process
While a smart charger automates the process, it's wise to monitor its progress.
- Let the Charger Work: The charger will automatically go through the Bulk, Absorption, and Float stages.
- Check for Heat: Periodically touch the side of the battery. It may become warm, which is normal. However, if it becomes excessively hot to the touch, stop the charging process immediately.
- Wait for Completion: Do not disconnect the battery until the charger indicates that the cycle is complete (usually with a green light or a "Full" / "Float" display). This ensures the battery has gone through the critical absorption stage and is genuinely fully charged.
Safety Precautions and Best Practices When Charging a Lead Acid Battery
Proper charging is not just about following steps; it's about adopting best practices that ensure both safety and maximum battery longevity. This section covers critical questions and advanced techniques for optimal battery care.
Can You Charge a Lead-Acid Battery to 100%?
Yes, you absolutely should charge a lead-acid battery to 100% regularly. Unlike LiFePO₄ batteries, lead-acid batteries require full charging.
Completing the absorption stage prevents sulfation by reversing sulfate buildup and balances all cells so they reach an equal state of charge, helping maintain capacity and extend overall battery life.
How to Check If a Lead Acid Battery Is Fully Charged
There are several reliable methods to confirm a full charge. For the most accurate voltage reading, let the battery rest for a few hours after disconnecting the charger.
- Smart Charger Indicator: The easiest way is to wait for your smart charger to indicate completion, usually with a green light or a display showing "FULL" or "FLOAT."
- Voltage Measurement: Use a digital multimeter to check the resting voltage. A healthy 12V lead acid battery should read 12.7V or higher when fully charged.
- Current Drop: During the absorption charging stage, the battery is considered full when the charging current drops to a very low and stable level (typically 1-3% of the battery's amp-hour capacity).
- Hydrometer Testing (Flooded Batteries Only): Measuring the specific gravity of the electrolyte is a very accurate method. A reading of 1.265 or higher indicates a full charge.
How Often Should You Charge a Lead Acid Battery?
Lead-acid batteries must be fully charged to 100% every two weeks (ideally), or at least once a month at the latest. A "full charge" means completing all charging stages, including bulk charging, absorption, and sufficient absorption time, until the battery is truly fully charged (for example, when the specific gravity reaches around 1.265).
Do You Need Temperature Compensation for a Lead-Acid Battery?
Unless your lead acid batteries are in a temperature-controlled environment, battery temperature compensation is mandatory. Colder temperatures require a higher charging voltage to achieve a full charge. A quality charge controller with an attached temperature sensor will automatically adjust the voltage, protecting your investment.
Can a Lead-Acid Battery Be Fully Discharged?
Protect your battery from over-discharge by setting a Low Voltage Cutoff (LVCO) on your charge controller or inverter. Never discharge a lead-acid battery beyond its recommended depth of discharge (DoD), as this can cause permanent damage and shorten battery life.
When to Equalize Lead Acid Battery?
Only perform an equalization charge when the specific gravity readings between cells vary by 0.025 – 0.030. Unnecessary equalization can damage the plates. Limit equalization time to around 2.5 hours per session to avoid excessive water loss and plate corrosion.
When is the Proper Timing for Adding Water for the Lead Acid Battery
For flooded lead-acid batteries, it is recommended to check and top up distilled water once a month until you are familiar with the battery's water consumption pattern. At the same time, measure and record the electrolyte specific gravity (SG) every two months to monitor the battery's health.
For sealed (AGM or Gel) lead-acid batteries, these steps are not required.
Why is it important to use similar lead-acid batteries when building a battery bank?
When creating a battery bank with multiple lead-acid batteries in series or parallel, it is crucial to use batteries of the same make, model, capacity, and age. Lead-acid batteries have slight variations in internal resistance and charging efficiency.
If you mix batteries, these differences cause an imbalance where some batteries will be consistently overcharged (leading to gassing and plate corrosion) while others are chronically undercharged (leading to sulfation). This imbalance will drastically shorten the lifespan and reduce the performance of the entire bank.